
Foundations in Felt Garments Online Workshop: Materials List
This is a complete list of everything we will be using. Remember that there is flexibility in the list. I’ve been as specific as possible, to be clear on what you will need, but I do encourage your exploration and creativity. For example, the pattern side shown on some of the sample pieces use 3 momme black silk gauze (tissue silk) over white wool, with extra silk colour layers cut into patterns, plus nuno prefelts. I describe this for those of you with experience that will want to take your pieces further. If you are new to garment making, and felting, just keep it simple and focus on the garment shaping! Please do email me if you have any questions about any of the items, for sources and possible substitutions.
Fibres and materials:
These lists include the materials you will need to do the basic construction. You can work with any design features you wish, including any of the techniques from Surface Design Online or Felting Over the Edge, and any materials you need for this further embellishment will be extra to this list. We can talk more about each project in the classroom. We have three weeks in between projects, so if you need something special for an upcoming project, you’ll have time to find it.
I suggest you keep your colour selection simple for these projects, and focus on the construction. Work with coordinating wool and silk fabric colours, and then use a contrast colour on the second side, or for embellishments.
For projects 1 and 2, you’ll be able to work on a single folding table, or similar surface. For projects 3 and 4, you may need extra width in the work surface, like two folding tables, or a dining or kitchen table, covered to protect the surface. If you are flexible or want to stretch some more, you can also make these on the floor!
All of these garments can be made as nuno felted garments, with a silk or cotton fabric layer, or with wool only. I suggest using silk fabric as it gives you a uniform surface- a structural surface, so if your wool layout has any thin areas, this won’t compromise the integrity of your garment at all. Silk also adds a wonderful luster to your garment! But working with wool only is very satisfying, and if you’d like to focus on your wool layout, and perfect it, these are great projects in which to do so!
I do suggest working with silk on one side at least of the Versatile Vest, as this garment works so well as a reversible piece.
Project 1: 4 Way Nuno Vest
4.0 ounces/113 grams extra fine merino roving, 19 micron or less
2.6 yards/ 2.4 metres silk habotai/china silk/paj/ponge silk (4-5 momme). Fabric must be a minimum of 30 inches (76 cm) wide.
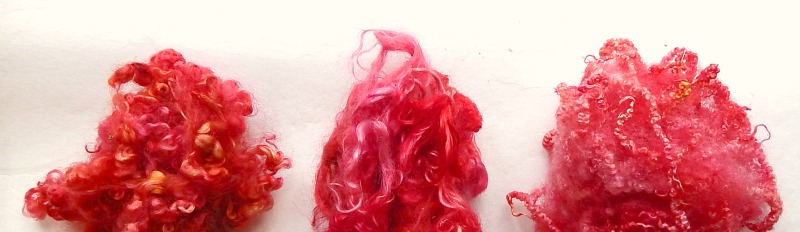
Optional: If you wish to make this Vest reversible, you can add wool designs, prefelt designs, a second silk layer, or exotic fibres. For wool and prefelts designs, you will only need a small amount of these materials. Instructions on making your own prefelts will be included in the online classroom. To add a silk fabric layer, you will need a length of silk, or combination of pieces, that total 30″ x 94″ (76 cm x 240 cm). For this, and the following projects, you can always use less expensive black silk gauze or tissue silk for the second side. It works well with all colours, and can be beautifully accented with some simple prefelt shapes. To work with exotic fibres, like silk tops, silk laps, ramie, or bamboo you will need 4 ounces (112 grams). In this project, and the following ones- this amount of exotic fibres will give you a full, luscious, luxurious surface, like many of you will have created in the Surface Design Online class. You can use much less- for just a light coverage (but you know that won’t be nearly so intoxicating!)
Decorative brooch or shawl pin for closure
Project 2: Capelet
4.0 ounces/115 grams extra fine merino roving, 19 micron or less
2.7 yards/ 2.5 metres silk habotai/china silk/paj/ponge silk (4-5 momme) if the fabric is 45″ (115 cm) wide
You can make the capelet from wool only, or make it as a nuno felted project. The instructions take you through making this as a nuno felted piece, but you can always skip those steps and materials to work with wool only.
For wool and prefelts designs, you will only need a small amount of these materials. Instructions on making your own prefelts will be included in the online classroom.
2 buttons (0.75- 1.25 inch / 2.0-3.0 cm), or snaps, plus snap tool. We will also cover making simple ties for this garments closure.
Project 3: Shaped Vest
4.0 ounces/115 grams extra fine merino roving, 19 micron or less
2.7 yards/ 2.5 metres silk habotai/china silk/paj/ponge silk (4-5 momme). Fabric must be a minimum of 45 inches (115 cm) wide.
You can make the Shaped Vest from wool only, or make it as a nuno felted project. The instructions take you through making this as a nuno felted piece, but you can always skip those steps and materials to work with wool only.
The Shaped Vest can be closed with a pin or button(s). You can always decide which type of closure you’d like, once the garment is finished. Optional: Decorative brooch or shawl pin for closure, or 1-3 buttons (0.75- 1.25 inch / 2.0-3.0 cm), or snaps, plus snap tool.
Project 4: Open Garment Design
The exact materials you will need for this project, will depend on what design you decide to make. You can make a dress, tunic, long vest, or jacket, with pockets, collar or hood, with gathers or pleats for extra shaping. I suggest having the following available to work with:
12 ounces/ 340 grams extra fine merino roving, 19 micron or less, this can be any one colour or a combination of similar colours.
5.5 yards/ 5 metres silk haboati/ paj/ponge silk (4.5 -5 momme) if the fabric is 45″ (114 cm) wide
You can make this garment from wool only, or make it as a nuno felted project. The instructions take you through making this as a nuno felted piece, but you can always skip those steps and materials to work with wool only.
Tools and Hardware
Tables: Table for workspace: 30″ (76 cm) x 96″ (243 cm)- a standard 2.5 ft x 8 ft folding table is ideal for laying out each of these designs. You’ll be able to see the full layout.
A 30″ (76 cm) x 72″ (183 cm) table will work- for two of the projects, we’ll scroll the work, just by about 8″ (20 cm). This will still work well and be only slightly inconvenient. Two folding tables in this size are idea for projects 3 and 4 and give you the greatest flexibility in any feltmaking project.
You can work on any work surface. These table sizes are given only as a suggestion, as they are very readily available, very inexpensive, and can be stored away easily, in between uses. You can work on a dining room or kitchen table, or a smaller table with a sheet of plywood on top, or you can work on the floor is your personal flexibility and stamina allow!
The first three projects can be completed on one folding table. The last project, depending on what you decide to make, make require some extra width. If you have any questions at all, just email me! Don’t let the table size, put you off!
Non Slip Rubber Grip Mat/Bubble Wrap:
I strongly suggest you work with rubber grip mat for these projects. It is very light to work with, speeds up the felting process significantly and produces a very tight felt.
I suggest working with a piece that is about 4′ x 8′. You can always get a larger single mat, and cut this big piece from it, and then also have smaller pieces to work with for smaller projects. You can find these for about $25 or less for this size, and this is an absolutely worthwhile purchase! You can use this for all felting projects other than paper felt. You definitely want to get the most flat rubber mat- not the knobby one, as the little knobs will break off over time.
You can instead use bubblewrap: For the first three projects: 2 pieces each, 36 inches (90 cm) x 96 inches (243 cm). You can tape two narrower lengths together if you need to. For the last project you may need to add some extra width here, but it will depend on your project. Bubblewrap section can always be taped together, as needed.
It is absolutely fine to use the work surface of your choice- grip mat, bubble wrap, netting… The instructions will all refer to bubblewrap and grip mat, but you can work with the felting surface of your choice.)
1 roll of laminate floor underlay (a soft foam available in most hardware stores/building supply centres). A roll costs about $20 (CDN) and will give you enough for the three resists we use in this class, plus more for future projects. The resists we make can be used over and over again, dozens of times before they start to show wear.
Roll of woven duck tape (silver tape- look for the weave pattern- the other one stretches and makes it very hard to work with.) or Tuck tape (red tape, used in Canada to seal the vapour barrier on houses).
Pool noodle, or 36″ (90 cm) length of 1.5″ (3,8 cm) diameter PVC pipe If you make your table risers from this-you’ll have about this length left from an 8 ft (240 cm) length of pipe, or 36 inch (90 cm) length of one inch diameter wooden dowel. You will only need one of these items. It is for rolling up the work initially, and rolling over the top of the work. The pool noodle will work well, but I prefer the firmness of the pipe or dowel for rolling. A wooden dowel, inserted into the centre of a pool noodle, is another excellent option.
1-2 packages painters drop cloth– thin plastic used as drop sheets. You’ll find this in most hardware stores or building supply centres.
Natural liquid dish soap or dish detergent (like Seventh Generation or Nature Clean)
Ball brause or other tool to wet out your felt
Small bucket for felting solution
Bamboo sushi roller ( optional-for felt cords)
Table risers– this will make your layout and felting time so much easier on your body. Look for bed risers at home accessories shops, or cut four 16 ” (40 cm) lengths of PVC pipe, that slide over the table legs. The length and diameter of pipe will depend on your style of table, where the bend is in the leg, and your desired work height- which will be at about counter height.
Sharp pointed scissors
Measuring tape
Calculator
Notebook and pen/pencil
Marker
2-3 old towels
Sources for Wool and Fibres:
This is a good starting point for excellent products, that help you create stunning garments. These companies sell the extra fine merino fibres, the silk fabric, and the silk tops/laps or ramie/bamboo tops.
Australia: Treetops Colour Harmonies: treetopscolours.com.au
USA: Outback Fibers: www.outbackfibers.com
512-222-WOOL (9665) (USA)
Europe: DHG: www.dhgshop.it
Wollknoll: wollknoll.eu
I suggest you get the best quality of materials you can. In felting, our greatest investment is our time. In making something handcrafted, it is already precious. We don’t use huge amounts of materials and produce almost zero waste. Always chose the very best materials you can afford. It is a small cost relative to the value of your time that you will put into the piece. Good quality materials will give you a better finish and end result. It’s worth it!
Contact me if you have any questions about materials and suppliers. If you have a design idea, you can email me, or we can discuss it in the online classroom, as soon as it opens!