

For this workshop you need three colours of silk habotai/paj/pongee in a 5 momme weight.
You need three pieces of silk habotai/paj/ponge, 4-5momme weight. One in each colour, that each measures 25cm (10inches) x 76cm (30 inches). You can also use the heavier weight of margilan silk, or lightest margilan silk, doubled. Your fabric may be wider than 76cm (30inches). It’ll be easiest to dye the full width of the fabric and then have the extra for other projects.
Dyeing basics: you need to know the weight of the fabric, to know how much dye to add. Each piece of silk will weight about 5-6 grams ( I’ve done the math for you, so you don’t need to do anything with this number!)
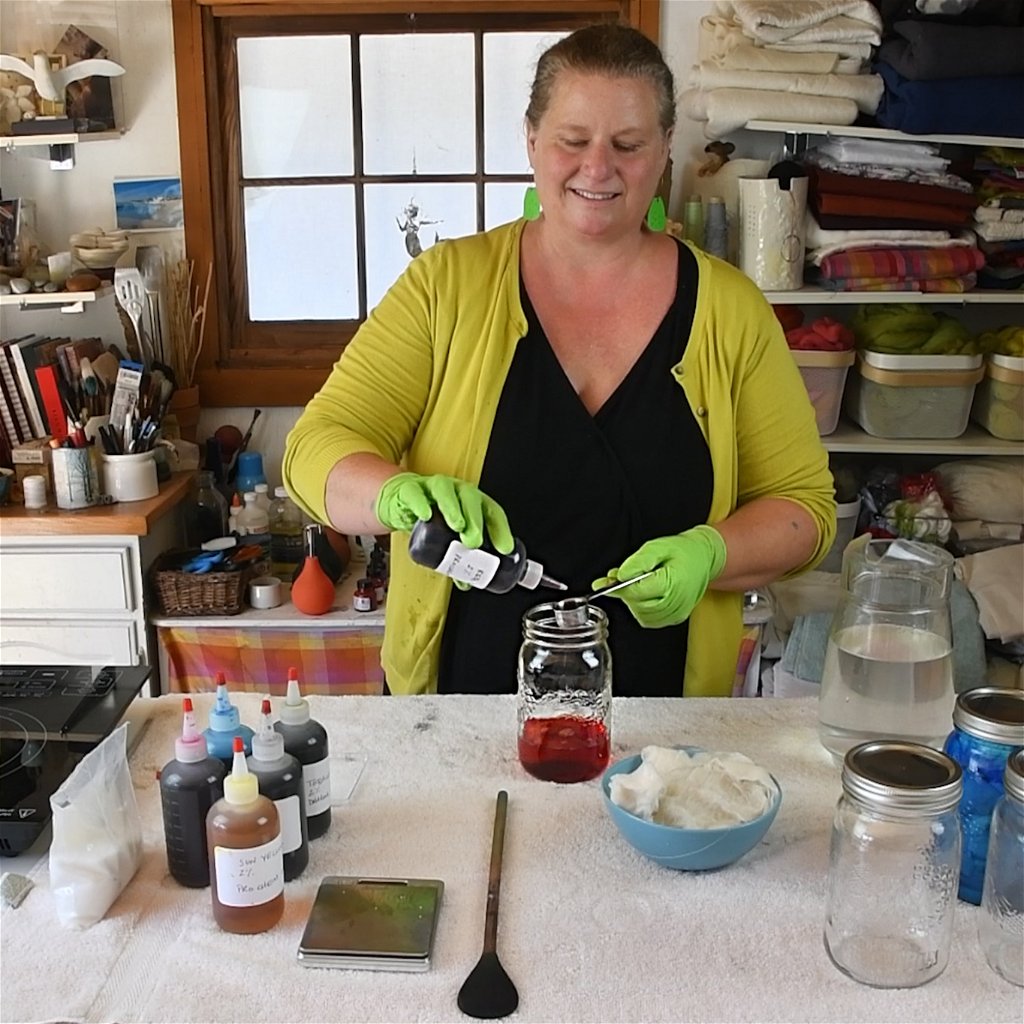
- Use a glass canning jar, or any wide mouthed glass bottle for your dyeing. Any dyeing tools and equipment need to be used only for dyeing, not for food use. So using a wide mouthed glass jar, one teaspoon and one wooden spoon, is the base minimum of tools you need , but will give you everything to do the dyeing effectively.
- Always wear a dust mask when handling dye powders. Ideally, cover your work surface with damp paper towels or an old towel, lightly wet, to catch any dye particles.
- Soak the silk fabric in warm water that has a drop of soap added, to clean any manufacturing residue from the cloth.
- Half fill the glass jar with hot water.
- Add 1 teaspoon white vinegar or 1/4 teaspoon citric acid. Stir well.
You’ll be using only tiny amounts of dye, even for more deep colours.
- For lighter colours, add only the tip of a teaspoon of the dye powder to a glass canning jar. For medium colours, add about 1/8 teaspoon of dye powder to the glass. Always add the dry powder to the water, not vice versa.
- I’m using a stock solution here, like we make in the dyeing class, but for this small dyeing project, you can add the dye powder directly into the water in the jar.
Now push in the silk fabric, using your wooden spoon.
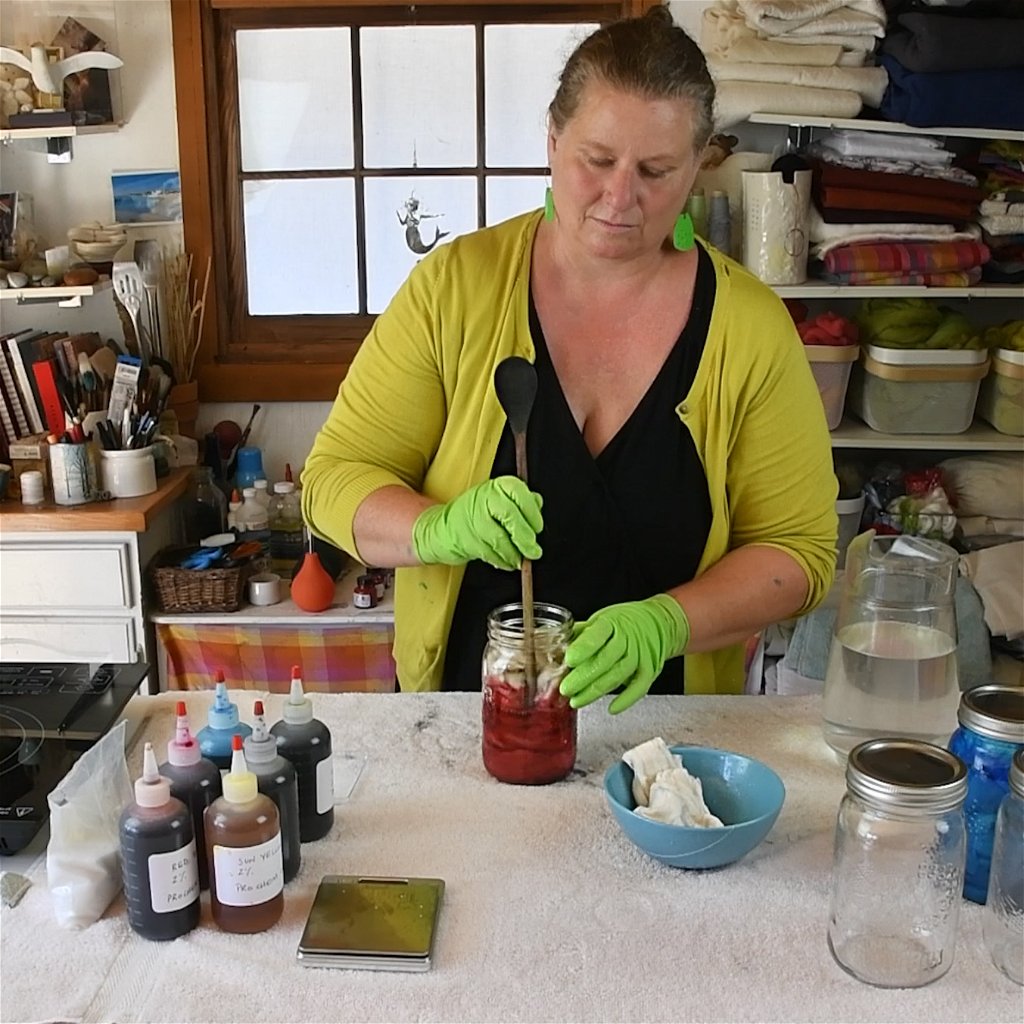
Add a little more water if you have space, but don’t fill up the jar more than 3/4 to the top.
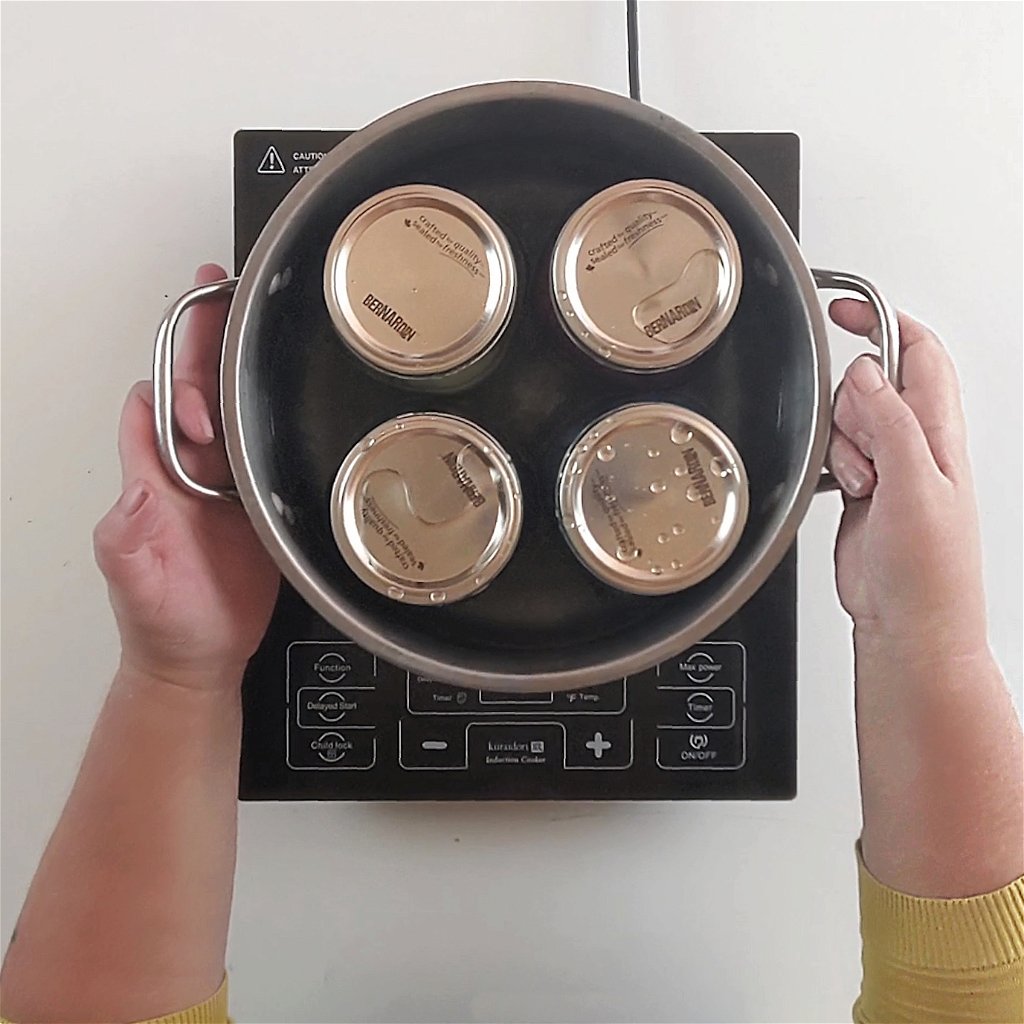
The dyes need to be heated to set them.
- You can heat the jar in a microwave at a medium setting, for about 1 minute x 2 or 3 sessions.
- Or you can fill a pot with hot water, and put the glass jar inside the pot, like a double boiler, and heat the water until it is at a low boil. Hold at this temperature for about 20 minutes. (you can do just one jar or colour at a time, to save on how much glassware you need that is dedicated to dyeing)
- Or you can very carefully put the glass jar in a hot oven- at about 250°F/120°C for about 20 minutes.
The main thing you are looking for here is that the water in the jar is completely clear, and all of the colour has been absorbed by the cloth.
- If the water is clear and the fabric colour is not as deep as you’d like, you can pull out the fabric and add a touch more dye powder, mix well, and then add the silk and heat again to absorb this extra dye.
Once you have the colour you want and the water is clear, let the silk and water cool in the jar to room temperature before rinsing well.
It is safe to dispose of the remaining water in the jar in sink, whether in a municipal or septic system, or us it to water outdoor acid loving plants.
It is the dye and dye powders you need to be most careful with in relation to health and safety. By using the wide mouthed jar, no dye will be in contact any of your cooking appliances- whether that’s microwave, stovetop or oven. I only suggest doing this for the small amount of dyeing we are looking at for this class. Ideally you would have a microwave dedicated to dyeing, and a stockpot dedicated to dyeing, depending on what method of setting you like best.
This is a very simplified version, but it’ll work well, requires little equipment, and is quite safe.