

The Felt Poncho is a great garment for throwing on over the top of just about anything; a personalized garment that instantly makes you feel uplifted and creatively stylish. This simple felt poncho is laid out as a rectangle with no resist, then sewn at the prefelt stage to create the poncho shaping. It’s a very easy to make garment that is flattering, beautifully draping, and can be worn in several variations.
This project came about from discussions in my online felting workshops. The conversations in the classrooms always generate new ideas for projects, techniques and applications, and this felt poncho is a great example of that rich creative nurturing!
This tutorial assumes some previous experience with feltmaking. If you need some help in following through on the different steps described here, read through my Introduction to Flat Felting Here!
Materials:
– Silk Habotai/Paj (4.5-5 momme) or Chiffon/Gauze/Tissue Silk (3.0-3.5 momme):
90cm x 220cm ( 36” x 86”)
-Merino Wool (19 micron or less): 80 grams (2.8 ounces) Use all one colour, or
include some additional colours for contrast and accent.
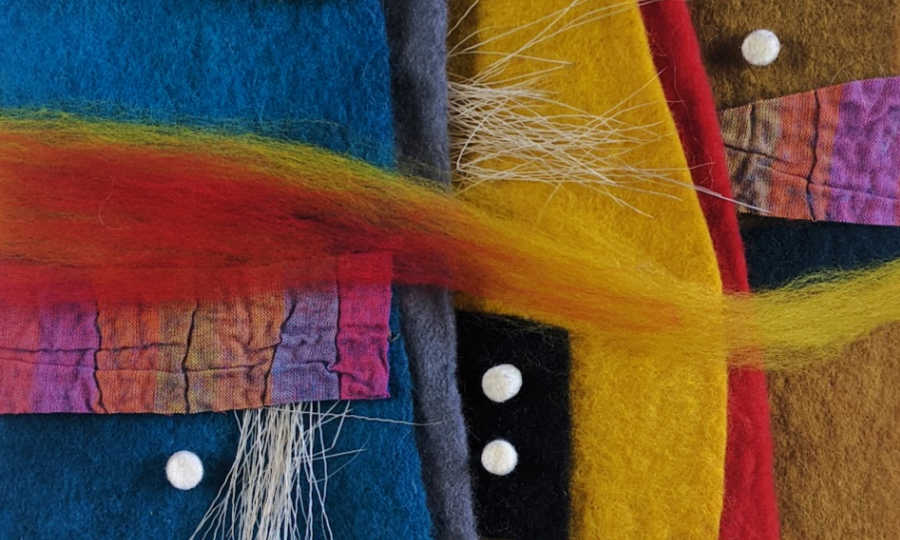
-Wool, Nuno and Exotic Fibre Prefelts for surface design
Construction:
Lay out the silk fabric on your work surface.
Divide the wool into two. One pile will be for the first layer, the other for the second. Lay out as lightly as possible. If you run short on wool, go ahead and use some more to finish each layer, but do try to work to this weight of layout for the best results.
Lay the first layer of wool.
In the first layer, the wool fibres should run along the long dimension of the rectangle.
In the second layer, on the long edge that will be the top of your poncho, lay the neck area out in the same direction as the first layer. That will be about 72cm (28”) long, or the central third of the top edge, and 22cm (8.5”) deep. Layout the rest of the second layer, perpendicular to the first layer.


The neck area that we have laid out in two layers going in the same direction will shrink more in that direction. This will pull in the neck and shoulder area, just through the shrinkage of the fibres, with no need to do any extra work to create that shaping. It’s very simple and very effective!
In the poncho pictured here, I have used the Tab Edging technique from my Felting Over the Edge Online Feltmaking Workshop.
I applied this edging to the lower, long side, and both short sides of the rectangle.
Wet out the wool and compress.
Tip: To make this piece reversible, add any surface design to the wool side now. This could include wool patterns, silk fabric shapes, prefelts, or silk or plant fibres. Wet out any new additions and compress.
Flip the piece over and add your surface embellishments to the silk side. In this piece, I’ve used both wool prefelt and also inked nuno prefelt from my Ink on Cloth workshop.
Prefelt the piece by surface rubbing to integrate the layers and surface additions, and then begin rolling the felt. Roll for about 5 minutes from each long side. Repeat. If there are wool fibres coming through the surface of your silk, you are ready to toss the felt. Pinch the silk surface only, to feel if any wool fibres come out. You may not see the fibres, but you will feel them. If no wool fibres are pulling out, roll from each end for 5 more minutes. If you can pinch out a few wool fibres, toss the piece 20-30 times to further prefelt the work and integrate the fibre layers.
Stop felting here, at the prefelt stage, once the piece has shrunk by about 10%. Allow the felt to dry completely. Roll up the felt in your work surface, tip up one end, so that the felting solution can drain out into a bowl or other vessel. You can speed up the process by covering the felt with a towel and rolling it up to draw out some more moisture. Unroll and leave flat to dry.
When dry, fold the poncho in half, and pin the two top edges together. Sew this shoulder seam, using ordinary sewing thread and needle, starting on the outside edge and stitching in towards the fold, leaving 40.5cm ( 16.0”) to the fold, open. This creates a shoulder seam and neck opening.
Rewet the felt and continue felting as usual. Alternate between tossing the felt, rolling the felt on itself, and surface rubbing, particularly on the edges to pull them in. The finished dimensions will be 66cm (26”) at the top, 71cm (29”) at the bottom, and 56cm (22”) deep. These are folded, flat measurements. You can see how the direction of the wool layout has gently altered the shape of the finished piece.

Rinse well and press while still damp, with an iron on a medium setting. This will refine the finish and improve the drape of the finished garment.
The poncho can be worn with the seam on the shoulder, so that the points are at front and back, just off centre.

Worn asymmetrically with the seam coming down the front, dividing the body into 1/3 -2/3. This moves the point over to one arm. The neck area can be folded in to the inside, creating a nice collar.

The poncho can also be worn with the seam at centre back, creating a straight line across the front and the two points will hang off the back. Fold the collar area down into folds, to create a nice neckline.


Such a beautiful garment Fiona, Great tutorial. Rae
Thank you Fiona!!! Making a garment has been on top of my bucket list. I have so enjoyed the 2 courses I took with you. You are extraordinarily talented and very gracious to share your gift🤗
Thank you so much!_
Many thanks from Argentina
Those two big lay out photos are a bit of felting bliss to me. Thank you for sharing this great pattern it looks amazing. It is lovely to see you wearing your own beautiful felt creation. A delight all round.
Wow .beautiful Fiona – thank you so much for more inspiration. You are amazing. Hope to see you back in New Zealand
Fiona, thank you for this inspirational tutorial! You are so talented and so kind – I feel a kinship with you since I am from Scotland and love reading about your adventures! I will be there for the month of August, alas, I will be teaching and how I wish I could take your course!
Soooo cute and great instructions! I can’t wait to make one to wear to the retreat in September. Thanks, Fiona!
Thank you – I can’t wait to make it!
My goodness. This is just gorgeous thank you for sharing.