Comparing wool roving and wool batting was once one of the foundations of the Surface Design class, but that exploration felt most possible for in person classes. I include the fibers in the online Surface Design class, as I think it’s a benefit for everyone to experience working with fibres in their different forms. In working through the class materials, I decided to do a little test to see what differences I would find when working with roving and batting, in a documentated study! I used 16 grams/ 0.5 ounce of extra fine merino roving, and the same amount of extra fine merino batting both from the wonderful DHG.
(see sources at the end!)
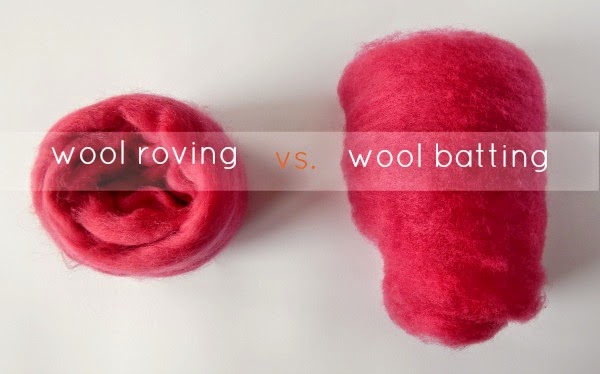
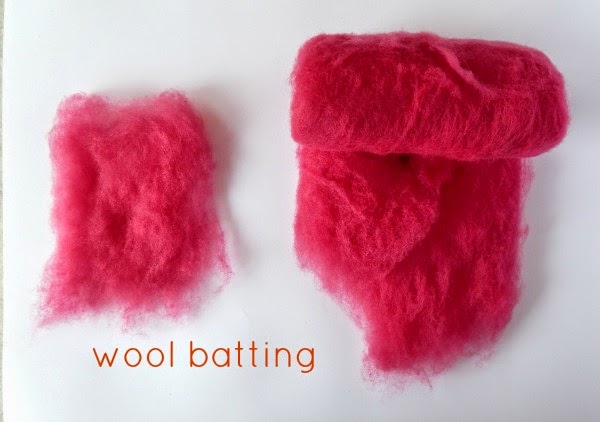
Wool batting has been scoured, dyed and carded. It comes in big sheets or rolls. The wool fibres are not directional, or straightened. When we are felting we want to have our fibres laid out in different directions to allow for the greatest connection of the fibres and their scales as they integrate to become felt. With batting we don’t need to pay any attention to the direction we lay out the fibres as they are already blended.
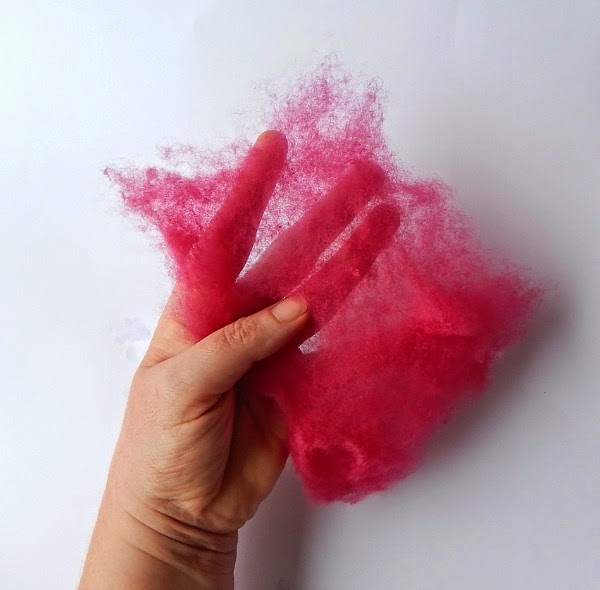
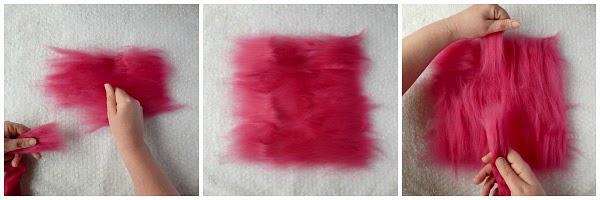
Batting is fantastic for quick layouts. The batting can be spread out to your desired shape and size, and layers can be built up to reach your desired thickness. To layout the batting, spread your wool out on your work surface. To remove extra fibre, use one hand as a clamp, held flat and firm on top of your fibres, and use the other hand to pull away the excess fibre-image left. Increase your layout size by laying on more batting, overlapping by about 1 inch (2.5cm) -image centre. If you have any thin spots or holes, fill in with wisps of the wool batting- image right. Very fast and easy.
Wool batting is especially useful for quick layouts for all flat feltmaking projects, like wall pieces, playmats, or making your own prefelt. It is also excellent as a base for vessels, hats and bags.
Wool batting is generally not as readily available of wool rovings, sliver or tops. Several breeds can be purchased in wool batting form, including Merino, Merino blends, Corriedale/Coopworth, Bergschaf, Norwegian C1, and Norwegian C1-Pelsull, Finnish and Icelandic. (resources below!)
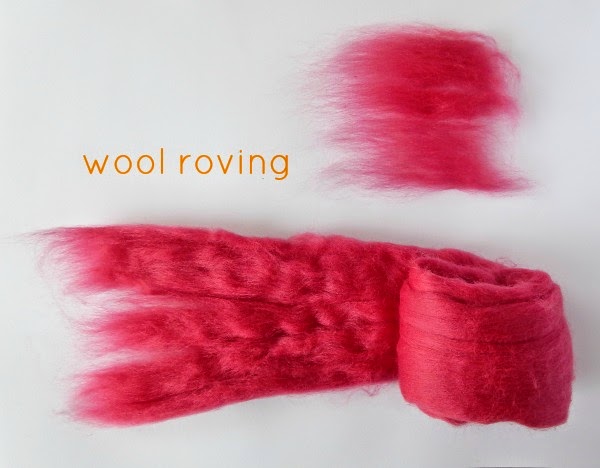
Wool roving has been scoured, dyed and carded, and combed, so the fibres are all straight and aligned in a single direction. It comes in long lengths, sometimes rolled up into balls. We can layout one layer of roving if we want to create a very fine light felt, but most often we will lay out multiple layers, with each new layer perpendicular to the last. This creates the greatest potential connection of the
fibres and their scales as they integrate to become felt. The fibres will shrink more along the length of the fibre and we can use this to influence the size and shaping of our felt work during layout. In general though, we want consistent, even, perpendicular layers.
There are several ways to layout your wool roving. The most common form is called shingling. We use one hand as a clamp and pull away a staple length of wool fibre. Each shingle overlaps the previous one by one third –image left. After laying out all the fibres in one direction, we’ll lay out the second layer of wool shingles, with the fibre direction perpendicular to the previous layer– image right. Two layers will create a lightweight consistent felt. More layers may be used either depending on the thickness of each shingle, or the desired thickness of your finished felt.
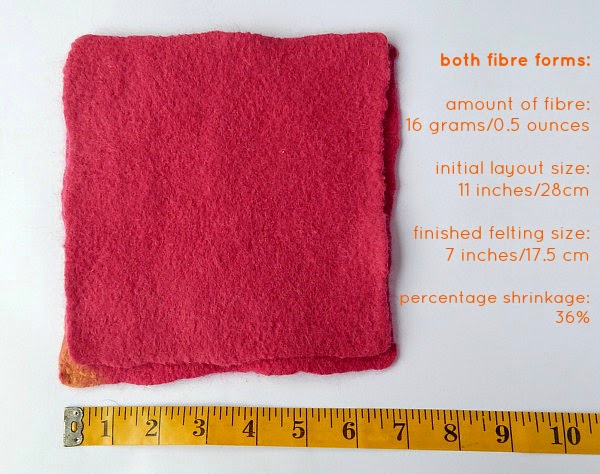
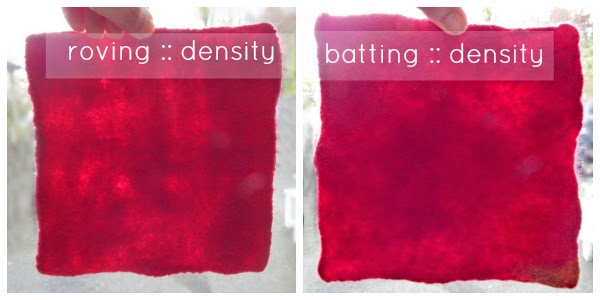
If I use the same weight of wool fibres, and start with the same size of layout, my end result should be the same with either wool roving or batting. I used exactly the same felting techniques for the same durations in both samples. The batting was faster to layout. The roving developed a more strong felted skin more quickly. The batting felt more cohesive and started to full or shrink sooner in the process. They were both finished in the same amount of time, and the finished size was the same in both samples, with equal shrinkage in the width and the length.
My batting sample was more even in finished density overall. If I had of been a little more attentive in my layout of the roving, I think it would have been as consistent, if not more than the batting. But I was working quite quickly, so in this case the batting had a slightly better end result.
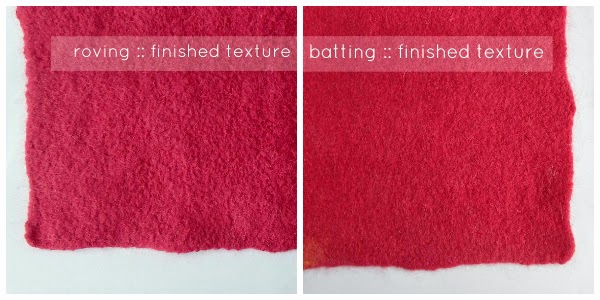
After fulling completely, rinsing and laying flat to dry, both samples are tight and evenly finished. The batting appears just a little more smooth and flat.
So… no dramatic results! The same amount and size of sample produced a similar end result, as happens when an experiment goes exactly as you think it will!
I chose between roving and batting based on two main criteria. The first is availability. What fibre form is available to me in the particular wool breed I want. I love C-1/pelsull for bags, and that is most readily available in a batting form. But I also make most of my bags in white and then dye them after, and for those I use Finnish wool, that is most readily available as a roving. The second criteria is the density of the finished felt. When I am making the lightest weight, structural felt garments, I will use an extra fine merino roving. I feel I have the most control over the density of my felt (when I don’t rush!) using the wool in a roving form.
It is valuable to touch and work with the different forms. Laying out with locks alone is another great experience. Exploring and using the different wools informs our felting sensibilities and understanding of the fibre qualities, as well as deepening our physical appreciation and hand recognition of the wools.
Here are some sources for you:
Batting:
Merino: Dyeing House Gallery (Italy)
distributed in Canada by ArtGus Studio
Merino: New England Felting Supply
Merino Cross: Living Felt
Norwegian C1, C1-Pelsull Blend, and Pelsull: New England Felting Supply
Bergschaf: Dyeing House Gallery (Italy)
distributed in Canada by ArtGus Studio
Finnish: Piiku (Finland)
Icelandic: Alafoss (Iceland)
Rovings or Tops are much easier to come by, and there are many wonderful online sources, including most of those above. Too many to list here, but I do purchase most of the coarse wool breed rovings from:
www.worldofwool.co.uk
Lots of felt with!
Warm wishes,
Fiona


Thank you Fiona!
One less experiment for me to do!!!
Thank you for this! It's my first time felting and now I know how many ounces I need to make a 14×14 piece!
Thanks for this post. I've always used roving (my parents live very close to World of Wool) but I'm just getting into using Piiku finnsheep wool and Kap merino so this is very useful information for me so thanks very much.
Fascinating. I'm lucky enough to live an hour away from New England Felting Supply, and have mostly used roving in the past, but I'm going to tackle some of my batting supply today!
Thanks so much for this post Fiona. It is very helpful.
This is an absolutely magnificent post! So generous of you to provide all this info along with the wonderful photos. I know how much work that represents!
interesante!